

ProDiscover Incident Response Project

Project Name: ProDiscover Incident Response Project
Description: Step by step guide to ProDiscover Incident Response
Author: Rohit D Sadgune
Summary of Contents
In this blog we will learn following things
- how to start prodiscover incident response
- Project number & case files
- Adding suspected evidence drive
- Saving project for further analysis.
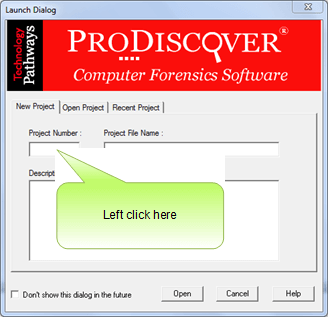
This is initial window of PIR where 3 case fields are mentioned “Project Number”, “Project File Name” & last is “Description”
Project Number is filed where we suppose to put forensics project number e.g [001-HDD-1-16-11-2014]
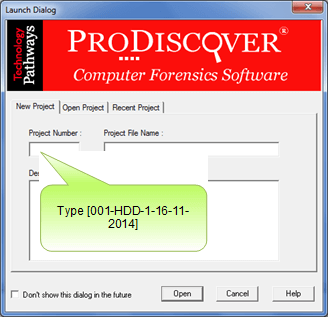
Case number is oo1 is from assumption that we will have maximum of 999 different variant of investigation
HDD-1 is for case-1 first Hard disk is for investigation.
Date is the thing which gives clarity or authenticity to respective case.
You can use same case number for project file name so to avoid confusion on later investigation

Forensics case description is not only helps forensics investigator but it also help for further litigation process

How add evidence drive in prodiscover for investigation

Left click here on Disk tab of PIR

Click on suspected HDD here I am selecting [PhysicalDrive0] item

Type [suspected Drive – 001]

Crick on [Add] button

To see the disk view content in tree mode please click on disk so as to expand the tree mode.

To expand tree level in PIR please click on PhysicalDrive0

To expand any drive to access or investigate internal content Left click drive letter

ProDisover Incident response kit offer parallel cluster view of HDD to investigator.
To access please click on disk tab of cluster view so as to examine branches which are bellow that view

The physical Drive will appear in the tree view of ProDiscover IR Left click to examine branches

Please click on corresponding drive letter to expand & Here you can see the cluster view of ProDiscover Incident Response.
In ProDiscover there are three components to analyze forensically
- used cluster with marked as green
- unused cluster is denoted by blue
- boot sector & partition data cluster are marked by red

To save particular project in PIR Select [File] menu item

Select [Save Project Ctrl+S] menu item

Select a location where you want to save case here i am saving on [Desktop] outline item


Note: – Entire demonstration of ProDiscvover is developed on eduction license of ProDiscover Incident Response


